For this example, I'm using an old legacy XP virtual image that I'm currently using to test the beta versions of Firefox and chromium.
The step is to increase the size of the disk from the command line. The following command took the primary partion from 2GB to 10GB.
nick@nick:~/vm/Windows XP$ vmware-vdiskmanager -x 10GB "Windows XP Professional.vmdk"
Grow: 100% done.
Disk expansion completed successfully.
WARNING: If the virtual disk is partitioned, you must use a third-party
utility in the virtual machine to expand the size of the
partitions. For more information, see:
http://www.vmware.com/support/kb/enduser/std_adp.php?p_faqid=1647
Once you have increased the size of the virtual physical disk, we now need to increase the partition and the NTFS filesystem on that partition. You could rush out an waste £80 of your hard earned money on a product like Partition Magic, or you can follow my simple guide and do it for free.
Step 1: Download a copy of the linux partition and filesystem manipulation software Parted Magic, make sure you download the iso file. Afterwards I would recommend leaving a donation for the developers hard efforts.
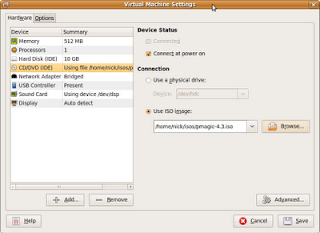
Step 2: Using VMware workstation, edit the settings for you virtual machine to now boot from the newly downloaded iso like this:

Step 3: Select the live CD boot option, or if you have set your VM with enough RAM you can select the RAM option:

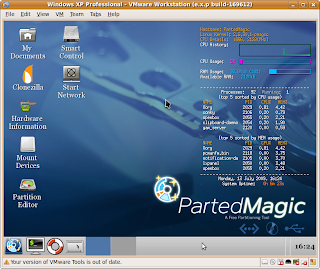
Once the ISO has booted you will end up at a screen like this

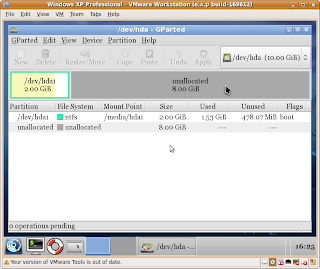
Step 3: Now click on the Partition Editor icon , and you will end up with a screen that looks like this.

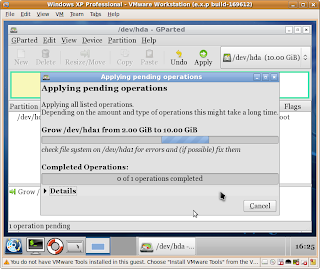
Click on the resize button, and select the whole of the disk, so this will grow the partition and filesystem to include the whole of your newly expanded disk. You can then watch the resizing process like this:

Once this has finished, you can re-boot your virtual machine, and you will have a nice new 10GB disk, where before it was a 2GB disk.


No comments:
Post a Comment